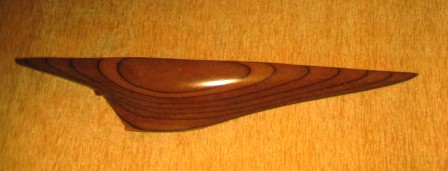
Half-Hull Construction step by stepAn article by Octávio Oliveira |
|
The third model on the left column, counting top to bottom,
Bought and restored by an antiquarian of nautical instruments, Coincidence or destiny, this “jewel” had already belonged to his grandfather… At August of 2001, after more than 100 years of life, being completely renewed, |
|
The job is beginning… |
|
The plans were amplified to get 60 centimetres of model’s length. |
|
Moulds in cardboard
|
|
Thickness. Pieces 1 to 4,--- 9 millimetres. The 5th--- 14,5milimetres. Without professional tools it is not easy to get these measures for our model, |
|
The moulds fixated to mark that contour. |
|
The pieces sawed with 1 or 2 millimetres out of the lines. Larger is corrected easily not the contrary… |
|
It shows the largest half of the deck, 5,4 centimetres. |
|
All pieces sawed. Two 0/5? The reason is easy…it was to get the correct total thickness of the model. |
|
The temporary assemblage, less the rudder, give an idea of our future half model. |
|
The arrows show the adjust to make with a file appropriate to wood. |
|
With the starboard geometric plan, I marked the distance |
|
Pieces 5/5 of different thickness glued together. |
|
Pieces 1/5, 2/5, 3/5, 4/5 their extremities numbered in black |
|
Applied 3 layers of leisure (dark red) in the reverse of the pieces. |
|
This and the next four photos show the correct position to glue, piece by piece.
|
|
Each time, it is easier to glue only a couple of pieces.
|
|
The complete conjunct. To guarantee a good gluing it is necessary 24 hours |
|
Behind half hull (not yet carved) the mould with vertical lines,
|
|
The mould of half of deck |
|
Two moulds are useful for the first adjustments. |
|
This mould on the top allows to cut the contour of deck |
|
One Knife and a little planer are good to improve our work in this time
|
|
The transversal plan is divided in the middle. |
|
Words for what?! The photo is very clear. |
|
The tools needed and the deck adjusted. |
|
The grinder and oil serve to sharpen the craft carving tools. |
|
Not a special reason to choose the number 8,
|
|
Alternately I opened grooves in the block. |
|
In sawing, as it is impossible to correct the mistakes with bitumen,
|
|
The wood rasp will improve a lot the work done. |
|
It is time…not for a break… but to glue the piece 05. |
|
It is possible to see the longitudinal lines in the model. |
|
It is time with the mould 15 and a wood rasp adjust the poop. |
|
Later the rudder in MDF of 3milimetre will be glued |
|
Now the sealing primer will be used frequently |
|
First coat …the model is wet…It will be necessary a lot of them. |
|
The contrast of the longitudinal lines after the finishing. |
|
A piece of specialty paper (I chose faia) cut a little larger. |
|
With small shears the glued paper, is trimmed to the periphery of the halfhull.. |
|
With an X- acto knife the previous cut is improved. |
|
With a small parallel rasp for metal, the paper on the deck is perfected. |
|
The model on a small stand with everything that is necessary in this final phase. |
|
In case that we should opt to place the Half-Hull on the wall. |
|
Our Nan placed on a wall. Notice, low in the keel the small plate with the name. |
|
If our option is to place it on a nicely finished backboard. |
|
Two points on the extremities of the silhouette are shown here.
|
|
Using the same template, we position it on our finished oak backbord, |
|
Now our model is ready to decorate a place in our house, |
|
The imagination has no limits. |


